
Embroidery isn’t just for grandma’s tea towels anymore – it’s a trendy way to add a personal touch to your wardrobe, and what better canvas than your favorite hoodie? As a leather jacket enthusiast with a passion for DIY fashion, I’m here to walk you through the process of how to embroider a hoodie like a pro.
Getting Started to Embroider a Hoodie
Gathering Your Supplies
Before you dive into how to embroider a Hoodie, make sure you have all the necessary supplies on hand. You’ll need embroidery floss in your chosen colors, a needle, an embroidery hoop, scissors, and, of course, your hoodie. Don’t forget to pick up some fabric marking tools, too – chalk or water-soluble pens work great for transferring your design.
Choosing the Right Hoodie
When selecting a hoodie for embroidery, opt for one made of a sturdy fabric like cotton or fleece. Thicker fabrics will hold up better to the weight of the embroidery and ensure your stitches stay secure. As for color, choose a hoodie that provides a good contrast with your embroidery floss to make your design pop.
Preparing Your Workspace
Set yourself up for success by creating a comfortable and organized workspace. Clear off a table or desk to work on, gather all your supplies within reach, and put on some good music or your favorite podcast to keep you entertained while you stitch away.
Design Selection and Preparation
Finding Inspiration
The first step in any embroidery project is finding inspiration for your design. Browse through Pinterest, Instagram, or even old-school embroidery pattern books for ideas. Whether you’re into floral motifs, geometric patterns, or quirky sayings, there’s no shortage of inspiration out there.
Selecting Your Design
Once you’ve found the perfect design, it’s time to think about size, complexity, and placement. Consider the size of your hoodie and where you want the embroidery to sit – on the chest, sleeve, or even across the back. Keep in mind that intricate designs may require more time and patience to complete, so choose wisely.
Transferring the Design
Now that you’ve chosen your design, it’s time to transfer it onto your hoodie. There are a few different methods you can use, depending on your preference and the fabric of your hoodie. You can trace the design directly onto the fabric using a water-soluble pen or transfer it using transfer paper and an iron. Whichever method you choose, be sure to test it out on a scrap piece of fabric first to avoid any mishaps.
Embroidery Techniques and Tools
Basic Stitches
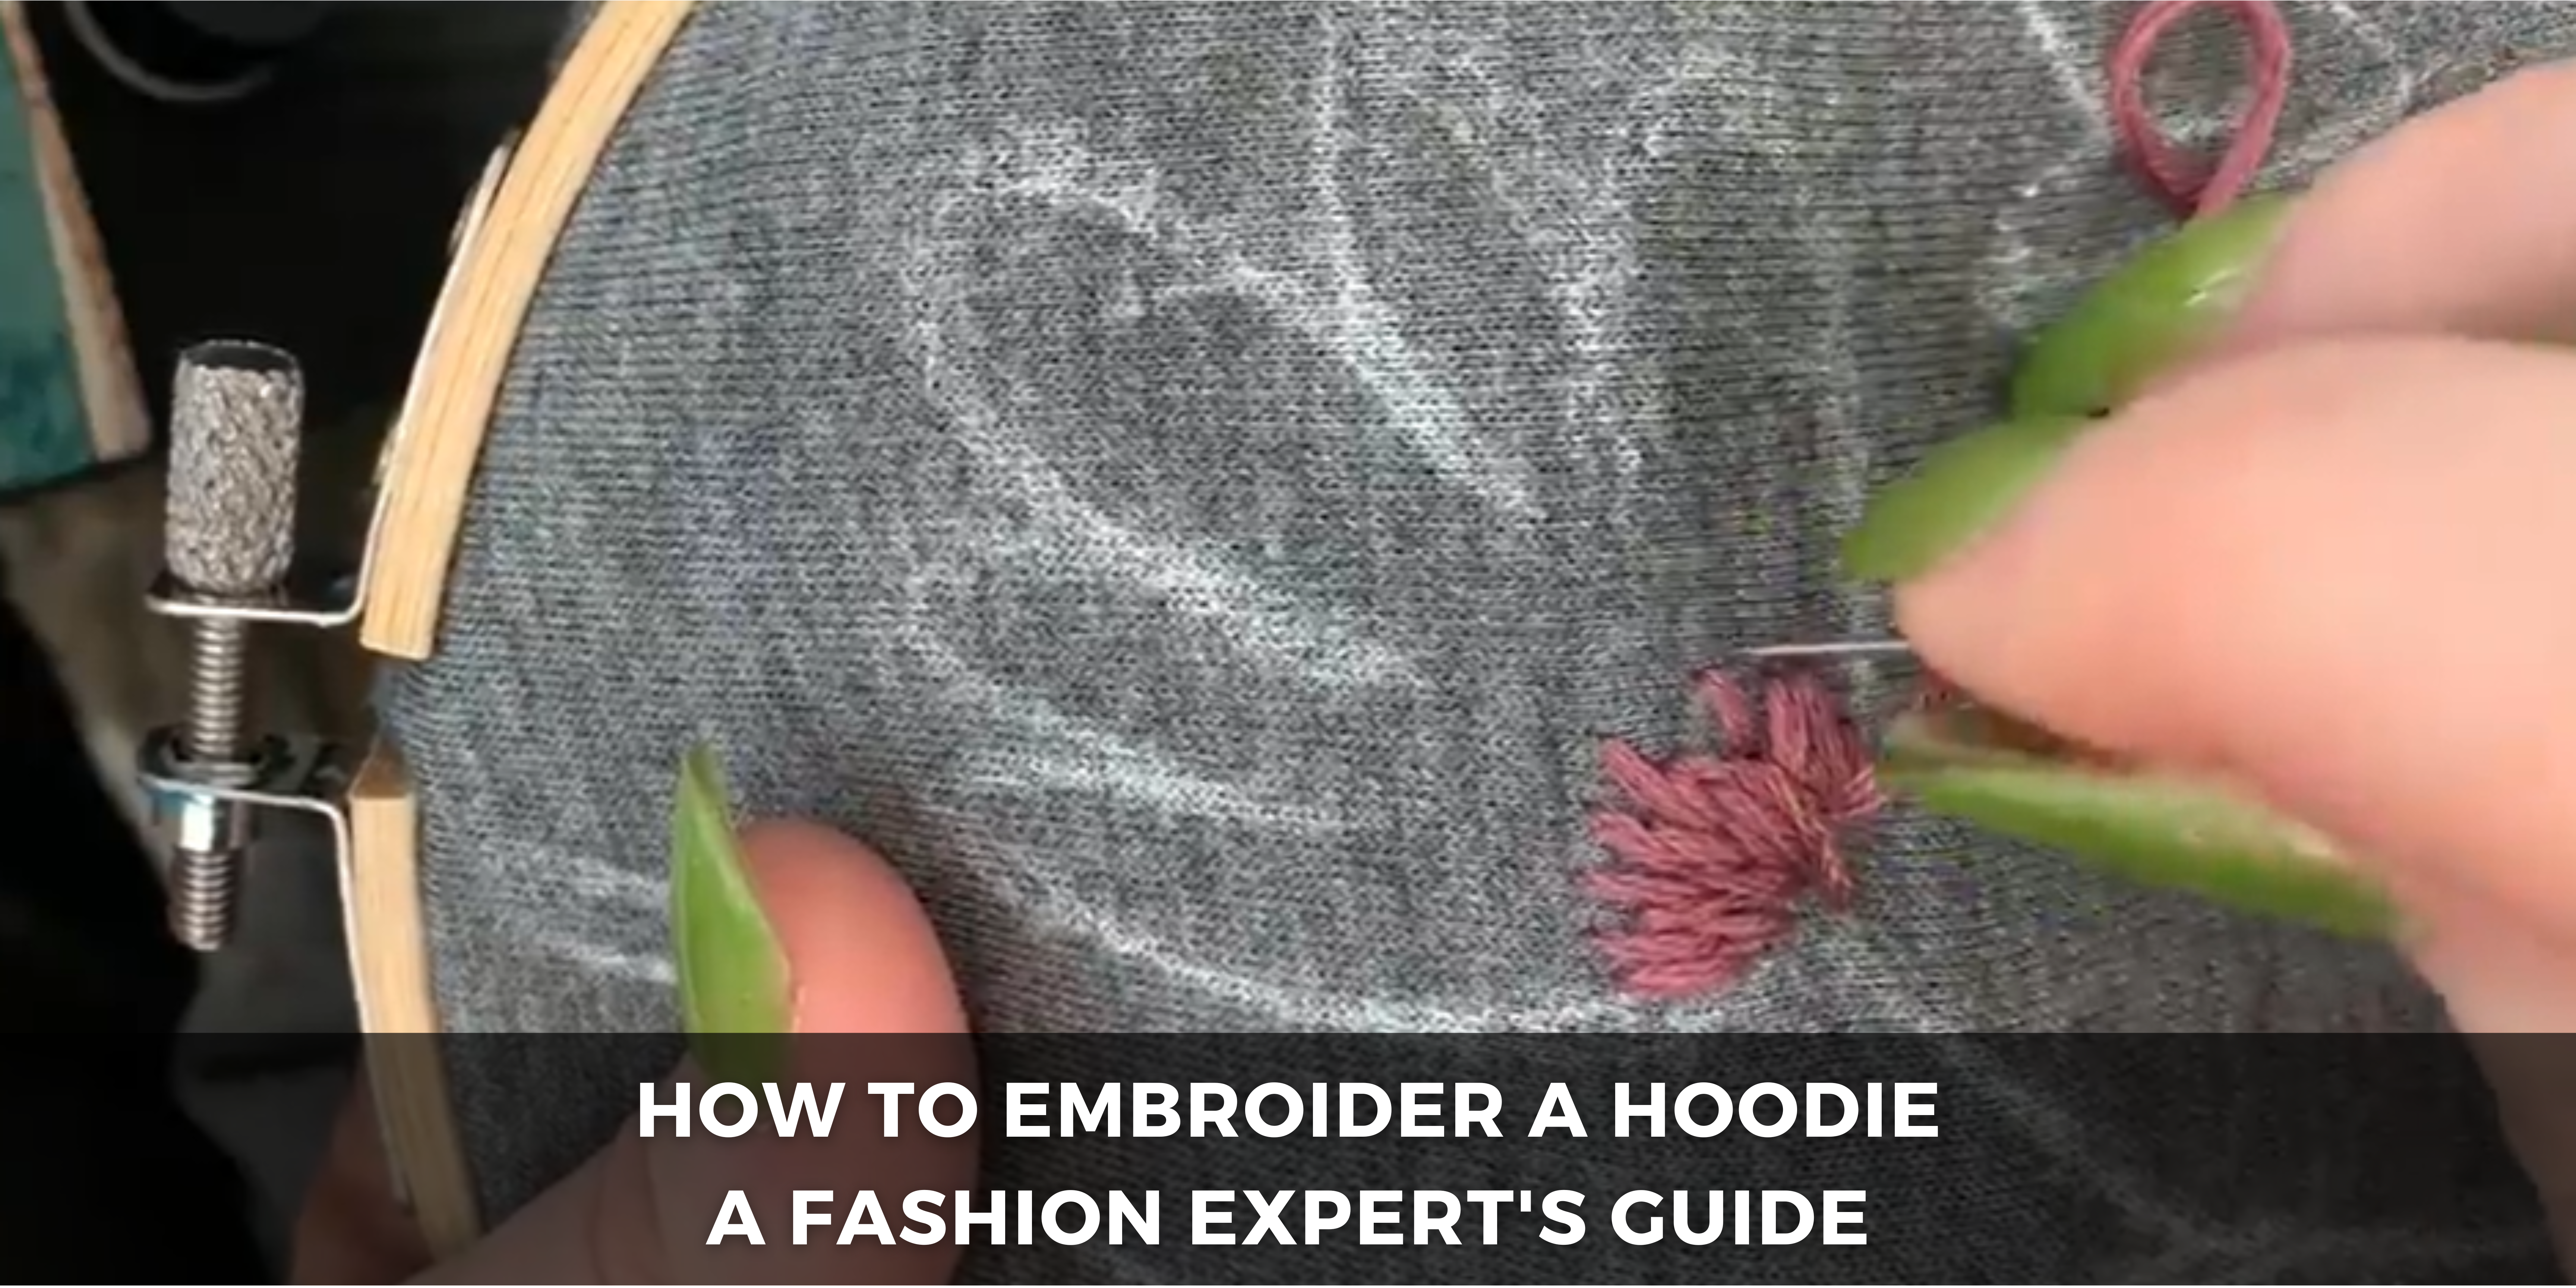
Embroidery may seem intimidating at first, but it’s actually quite simple once you get the hang of it. Start with some basic stitches like the backstitch, running stitch, and satin stitch to outline your design and fill in larger areas. There are plenty of tutorials and videos online to help you master these stitches – trust me, and you’ll be stitching like a pro in no time.
Exploring Advanced Stitches
Once you’ve got the hang of the basics, don’t be afraid to experiment with more advanced stitches to add texture and detail to your design. French knots, chain stitches, and lazy daisies are just a few examples of stitches you can use to take your embroidery to the next level. Play around with different combinations and see what works best for your design.
Choosing the Right Tools
When it comes to embroidery, having the right tools can make all the difference. Invest in a good quality embroidery needle – one with a sharp point and a large eye to accommodate multiple strands of floss. An embroidery hoop is also essential for keeping your fabric taut and preventing puckering while you stitch.
Step-by-Step Embroidery Process
Starting Your Stitching
With your design transferred and your supplies at the ready, it’s time to start stitching! Begin by anchoring your thread on the backside of the fabric and bring it up through the front where you want to start stitching. Take your time and work slowly and methodically, following the lines of your design.
Working Through the Design
As you work through your design, please pay attention to the tension of your stitches and make sure they’re evenly spaced. Don’t worry too much about perfection – a little bit of imperfection adds character to your embroidery. And if you make a mistake, don’t be afraid to undo your stitches and try again.
Finishing Touches
Once you’ve completed embroider a hoodie, it’s time for the finishing touches. Tie off your threads on the backside of the fabric and trim any excess. If your design has any areas that need filling in, go back and add additional stitches as needed. And finally, give your hoodie a good press with an iron to smooth out any wrinkles and set your stitches.
Troubleshooting and Tips
Dealing with Common Challenges
Embroidery isn’t always smooth sailing – you may encounter knots, tangles, or fabric issues along the way. Don’t let these challenges discourage you. Take a deep breath, step away from your project for a moment if needed, and come back with fresh eyes. There’s always a solution – whether it’s gently untangling a knot or using a stabilizer to prevent fabric puckering.
Embracing Imperfections
Remember, embroidery is a form of self-expression, and it’s okay if your stitches aren’t perfect. Embrace the imperfections – they’re what make your embroidery unique and special. And if you’re feeling particularly adventurous, don’t be afraid to incorporate mistakes into your design for a whimsical touch intentionally.
Advanced Techniques
Once you’ve mastered the basics, don’t be afraid to experiment with advanced techniques like mixed media embroidery or incorporating beads and sequins into your designs. The possibilities are endless, so let your creativity run wild and see where it takes you.
Embroidery Care and Maintenance
Washing Your Embroidered Hoodie
After all your hard work, you’ll want to make sure your embroidered hoodie stays looking its best for as long as possible. Always follow the care instructions on the label and avoid washing your hoodie in hot water or using harsh detergents that can fade the colors of your embroidery. Instead, opt for a gentle detergent and wash your hoodie in cold water on a delicate cycle.
Storage Considerations
When storing your embroidered hoodie, avoid hanging it on a wire hanger, as this can distort the shape of the fabric and cause stretching around the embroidery. Instead, fold it neatly and store it in a drawer or on a shelf away from direct sunlight to prevent fading.
Repair and Restoration
Over time, your embroidered hoodie may start to show signs of wear and tear – loose threads, fraying edges, or even small holes in the fabric. Don’t worry; and these issues can usually be easily fixed with a needle and thread. Trim any loose threads, reinforce any weak areas with extra stitches, and patch any holes with a small piece of matching fabric.
Embroider a hoodie is a fun and creative way to personalize your wardrobe and add a touch of handmade charm to your everyday style. Whether you’re a seasoned stitcher or a complete beginner, I hope this guide has inspired you to pick up a needle and thread and give embroidery a try. So grab your supplies, unleash your creativity, and get ready to stitch up some serious style!